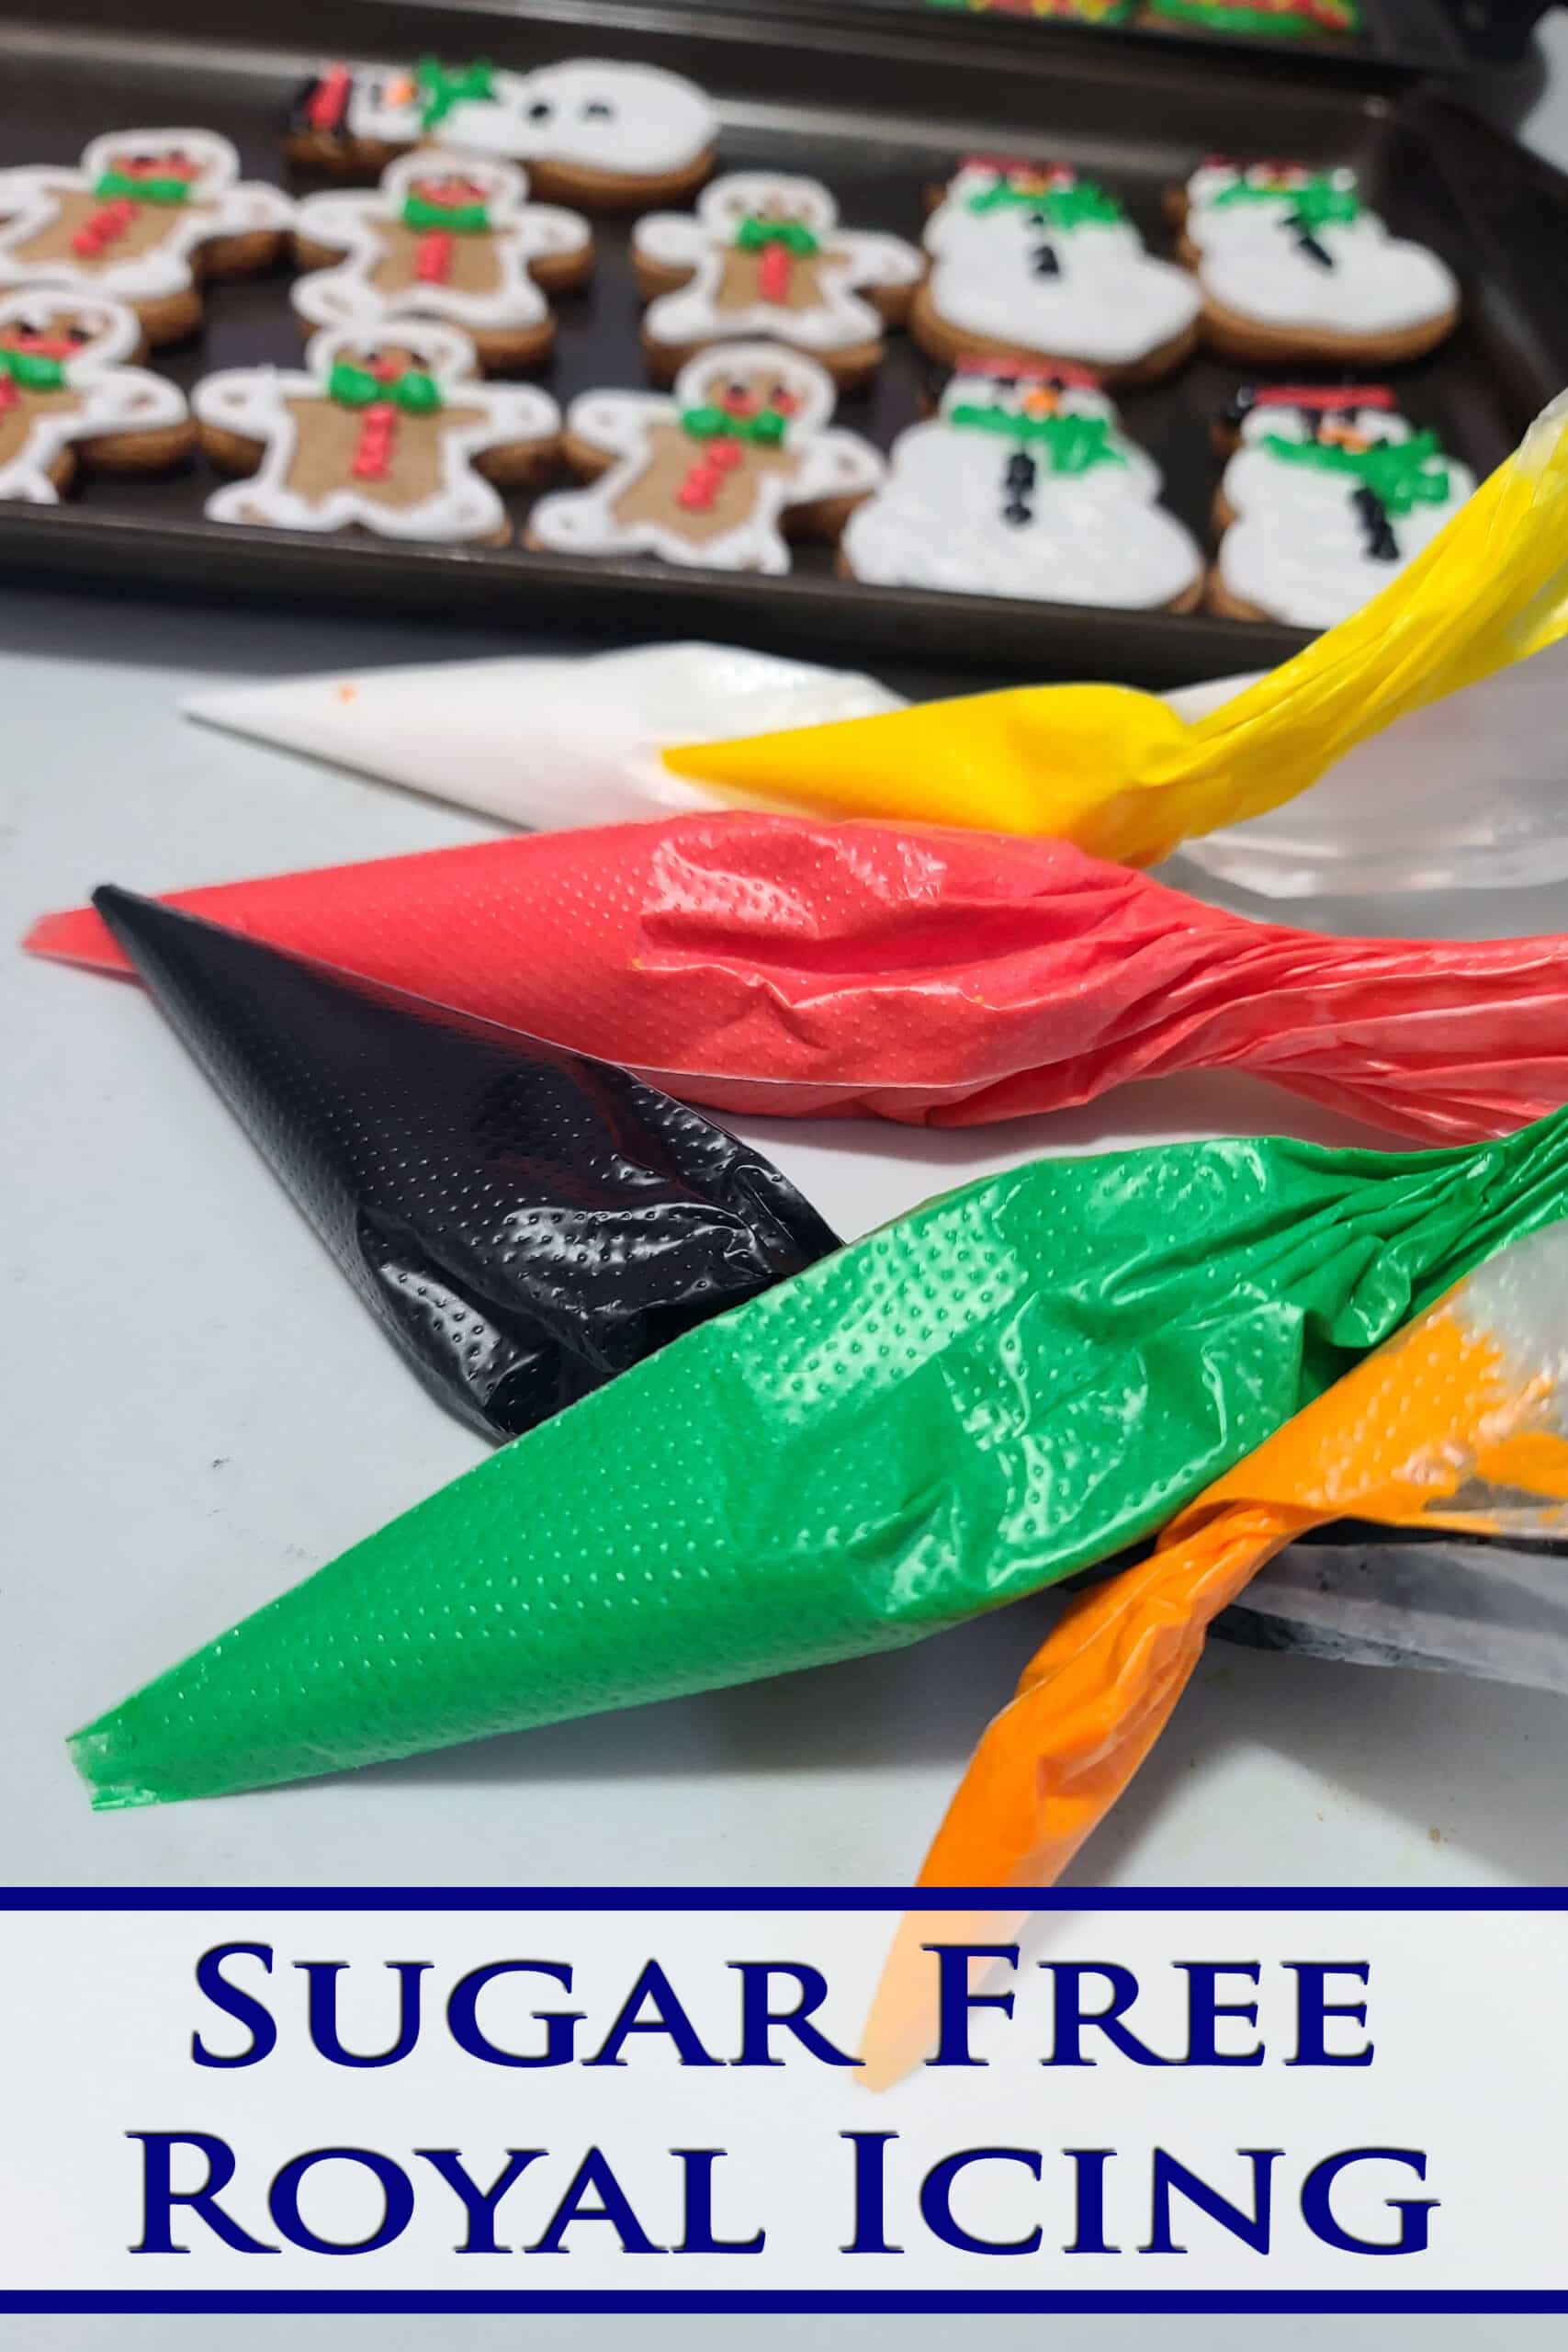
Looking for a keto way to decorate sugar cookies or gingerbread? This sugar free royal icing is a lot like the real thing - it even hardens!
Some of my favourites have been the Pecan Pie Cookies, Peanut Butter Pecan Chocolate Chip Cookies, and the Triple Chocolate Cookies.
I swear, each one is better than the last - all of them are fantastic, though.
With the holidays approaching, I wanted to design some tasty recipes for Keto Sugar Cookies and Keto Gingerbread Cookies.
The thing is - I wouldn’t be happy with them, if they didn’t have royal icing.
Royal icing is that white icing you’ve seen on super traditional gingerbread cookies. It pipes stiff, can be thinned to “flood” a cookie for a flat surface, and dries hard.
Because of those properties, it’s both the perfect icing for assembling gingerbread house, AND the best choice for decorating cookies.
Buttercream frosting may taste great, but it just doesn’t harden in the way you want, for cookie decorating.
After stressing out about the idea - I was concerned about how much allulose LOVES to draw water from the air! - I finally got to experimenting.
After finally playing around with it a bit, I’m happy to finally be able to share my sugar free royal icing recipe!
Keto Royal Icing!
This sugar free royal icing recipe makes just over 2 ½ cups of icing, which is enough to fully decorate one batch of my Keto Pumpkin Spice Cookies, Keto Sugar Cookies, or Keto Gingerbread Cookies.
It makes that stark white royal icing that you expect from my Traditional Royal Icing Recipe and my Easy Royal Icing Recipe, and only behaves slightly differently.
Anyway, 16.666 grams of carbs per serving come from sugar alcohols, with less than a third of a gram of carbs coming from the egg white and lemon.
So, this is essentially a zero net carb recipe!
Before I get to it, I should mention that I have a tutorial on Decorating Sugar Cookies, if you need help on that front.
Anyway, LOADS to talk about, so let’s get to it!

Ingredients
As with traditional royal icing, my sugar free royal icing needs only 3 ingredients - well, 4 if you include food coloring. (More on that in a bit!).
A few notes for you:
Homemade Icing Sugar
I use regular Allulose, as I find it easier to find - and cheaper! - than Powdered Allulose.
Much like with regular sugar -> confectioners' sugar, you can run granulated allulose in a high speed food processor to turn it into a sugar free confectioners’ sugar!
SO that’s what I do. Homemade powdered sugar is way cheaper than store bought, when it comes to keto friendly sweeteners!
It would likely work, if you want to use erythritol - just know it’ll leave that minty feeling. It just didn’t sound like something I wanted on my keto gingerbread cookies, you know?
Some flavours / sensations just don’t work together, IMHO!
Lemon Juice
Lemon juice actually serves a few purposes when it comes to royal icing, but it does NOT serve the one purpose that a lot of people think it does!
The citric acid in the lemon juice stabilizes the eggs, cuts the sweetness a bit, and adds some flavour.
What it doesn’t do? Kill bacteria! (Not to worry, I’ll get to what DOES make royal icing safe - in a bit!)
For the best flavor, you should use freshly squeezed lemon juice if possible - the bottled juice just doesn’t taste as good.
That said, you can use an different form of acid if you prefer - fresh lime juice or vinegar (white or apple cider) work as well.
Raw Egg Whites...
Meringue Powder (Usually Wilton Meringue Powder) is my go-to when making regular royal icing for other people.
Raw eggs aren’t recommended for the elderly, the very young, or those with a compromised immune system (basically half the population, these days!), so using meringue powder is the preferred method, as it’s the safest.
... but it’s got sugar in it, so it’s not exactly keto friendly.
I wanted to see if I could find some egg white powder, but it’s hard to find here, and WILDLY expensive where I could find it.
So, I use 2 large fresh egg whites for this recipe.
Because we’re using raw eggs, I recommend using the fresh egg whites - the freshest, best quality eggs that you can - pasteurized egg whites, if at all possible.
So, for this recipe you’d use 4 tablespoons of pasteurized liquid egg whites.
Once you’ve done all you can to avoid using eggs with salmonella in the first place, know that it’s the drying process - NOT the use of a acidic environment - that makes royal icing generally considered safe.
Salmonella needs a wet environment.
Not only is dried royal icing NOT wet in any way, it’s full of sugar - and sugar has been said to draw water out of bacteria, basically killing it.
I haven’t seen any studies done involving sugar substitutes, but when it comes to allulose specifically?
It seems to be even more hydrophilic than regular sugar is, from all of my experimentation - and that’s while you’ll probably never see a sugar free Peeps recipe here, despite my MANY attempts to design it!
Anyway, that’s probably more microbiology than you wanted from a food blog, but figured you’d like to know why I’m not personally worried about the use of raw egg whites in this recipe.
A Few More Tips for Using Egg Whites
How you handle your egg whites impacts the success of your sugar-free royal icing, so a few tips:
Whether using a stand mixer or a hand mixer, you just want to be sure that everything is extremely clean.
Egg whites can be fussy, and any stray bit of grease on your bowl or whisk attachments can break down the egg white structure in the icing.
Also note: Eggs separate best when they’re really cold, but whip up best when they’re at room temperature.
So, shell eggs straight from the fridge, and let them warm up for a couple of minutes - if you’d like a bit more ease in whipping them.

How to Make Sugar Free Royal Icing
The full recipe is in the printable recipe card at the end of this post, here is the visual walk through.
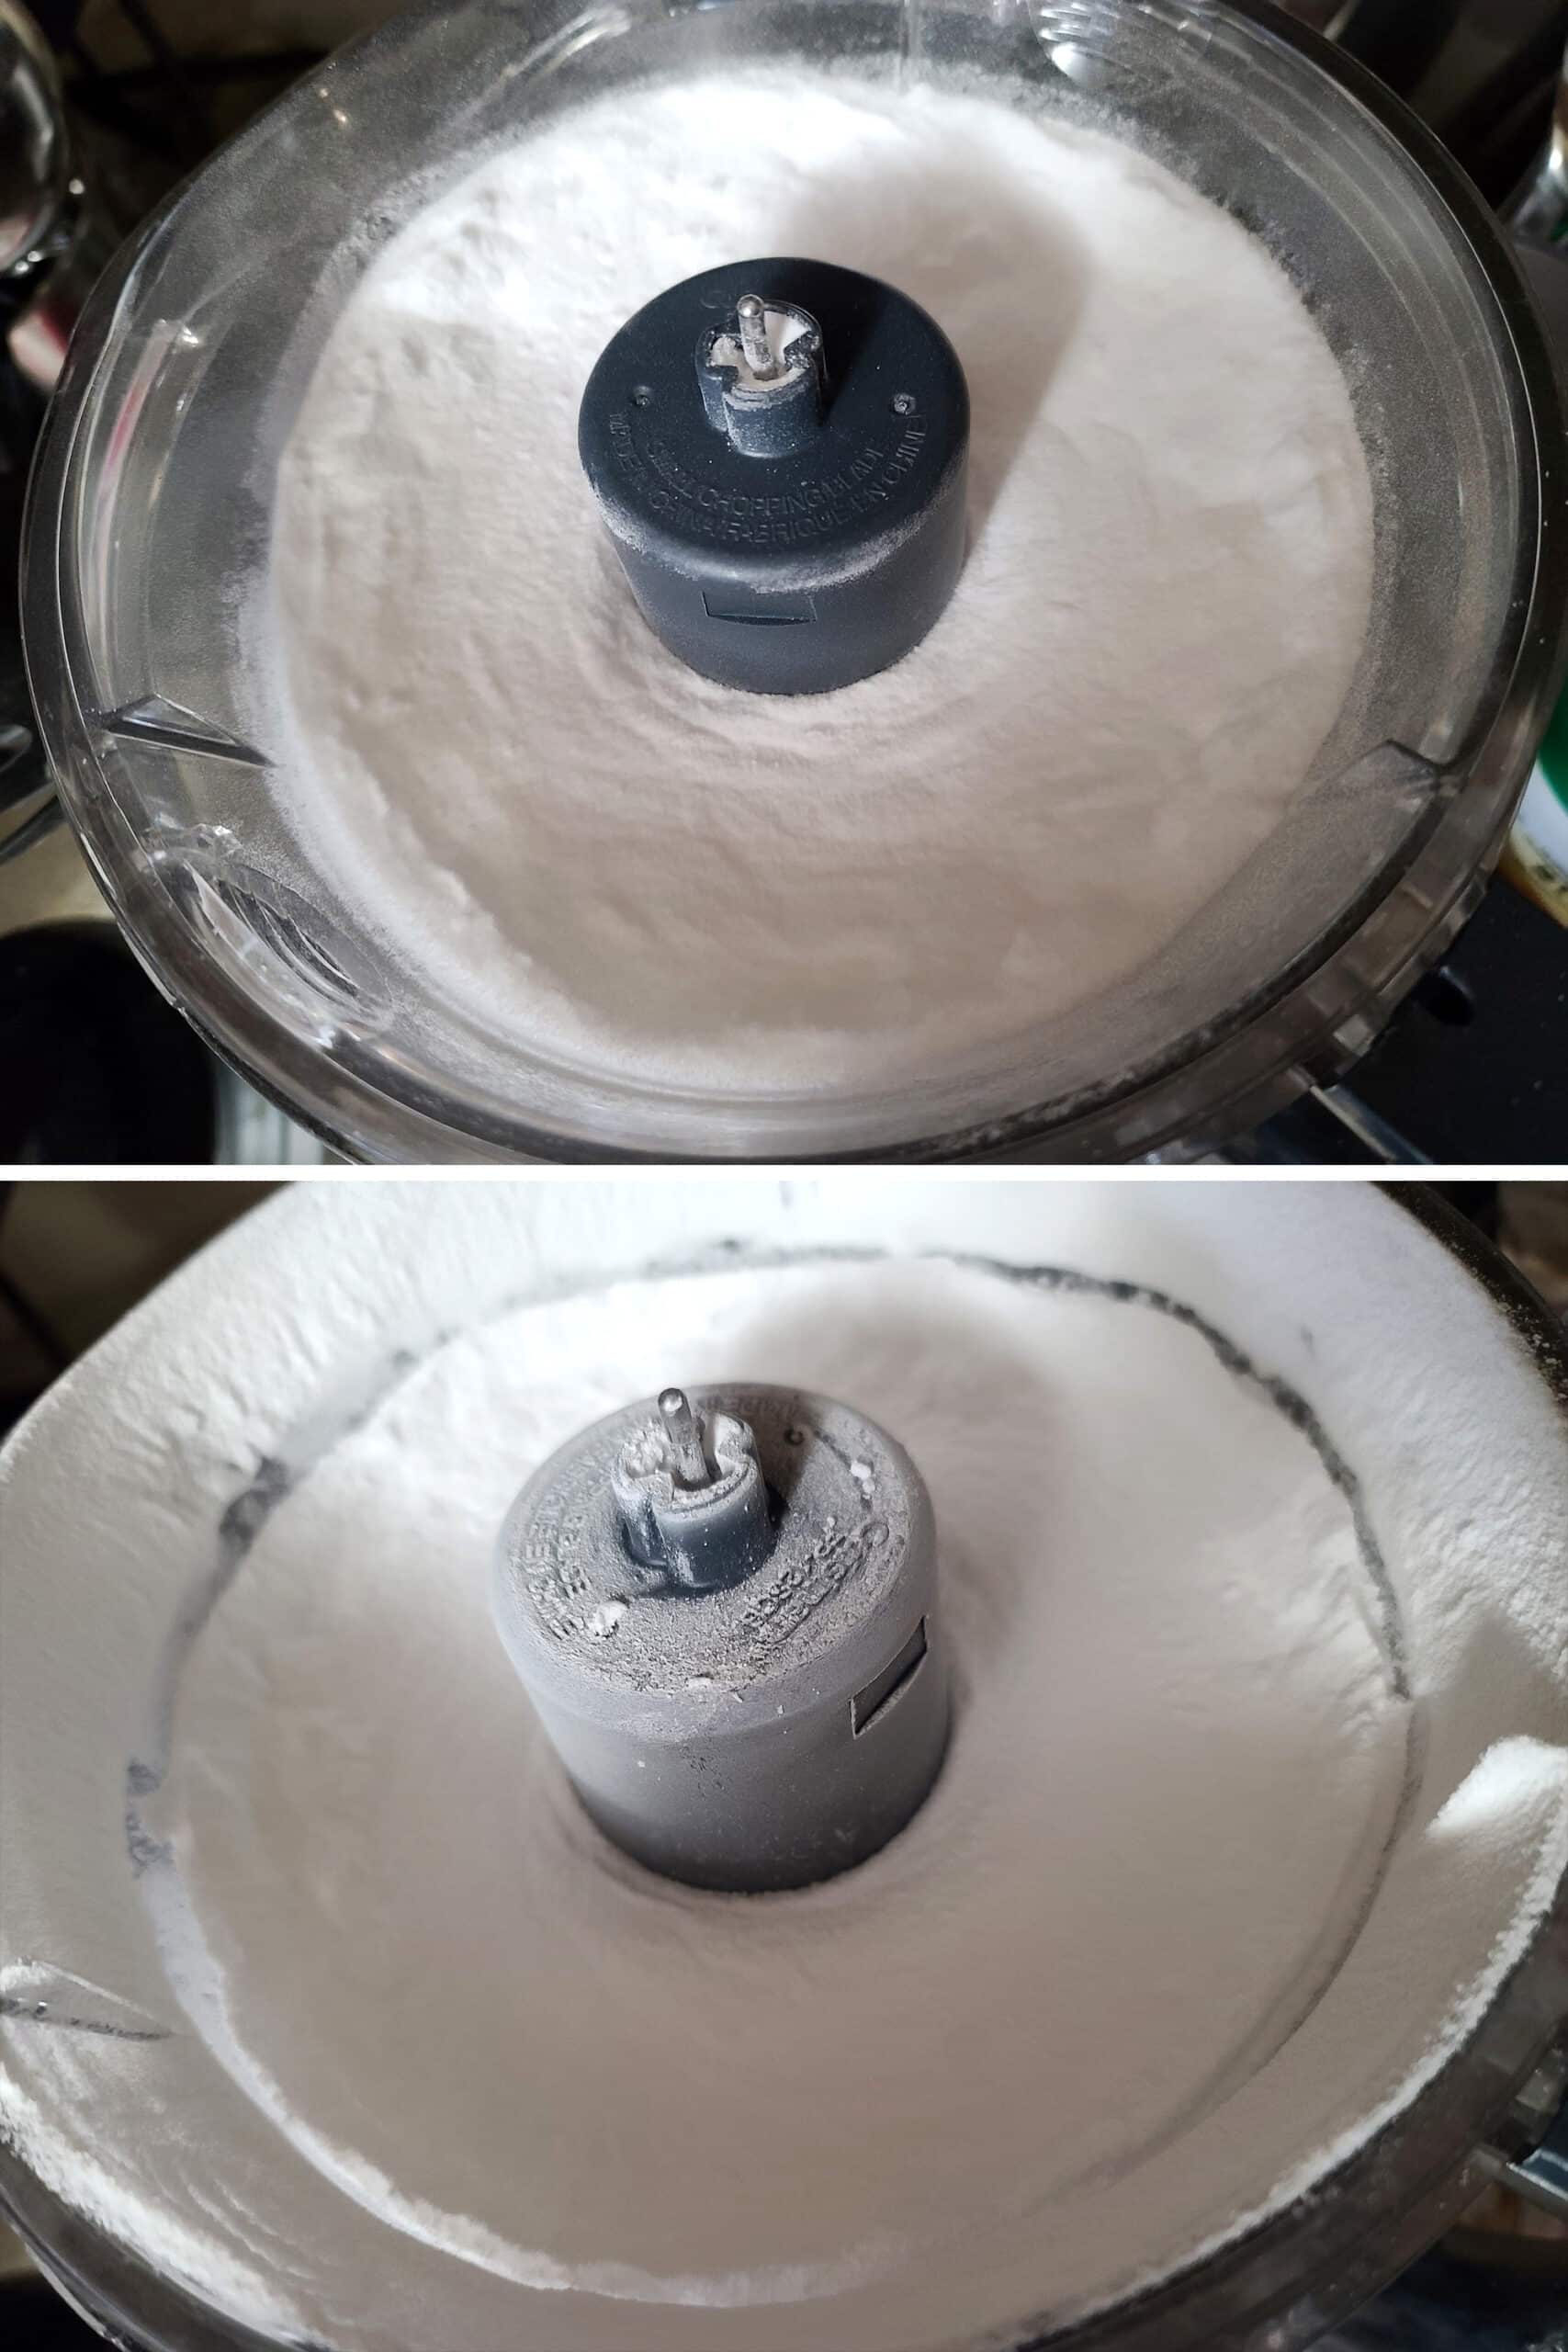
Measure allulose into a mini food processor, let it run until the allulose is powdered.
You want a REALLY fine powder - if you leave it granulated at all, your sugar free royal icing will have a weird texture.
Leave the lid on - letting the dust settle - while you start with the egg whites:
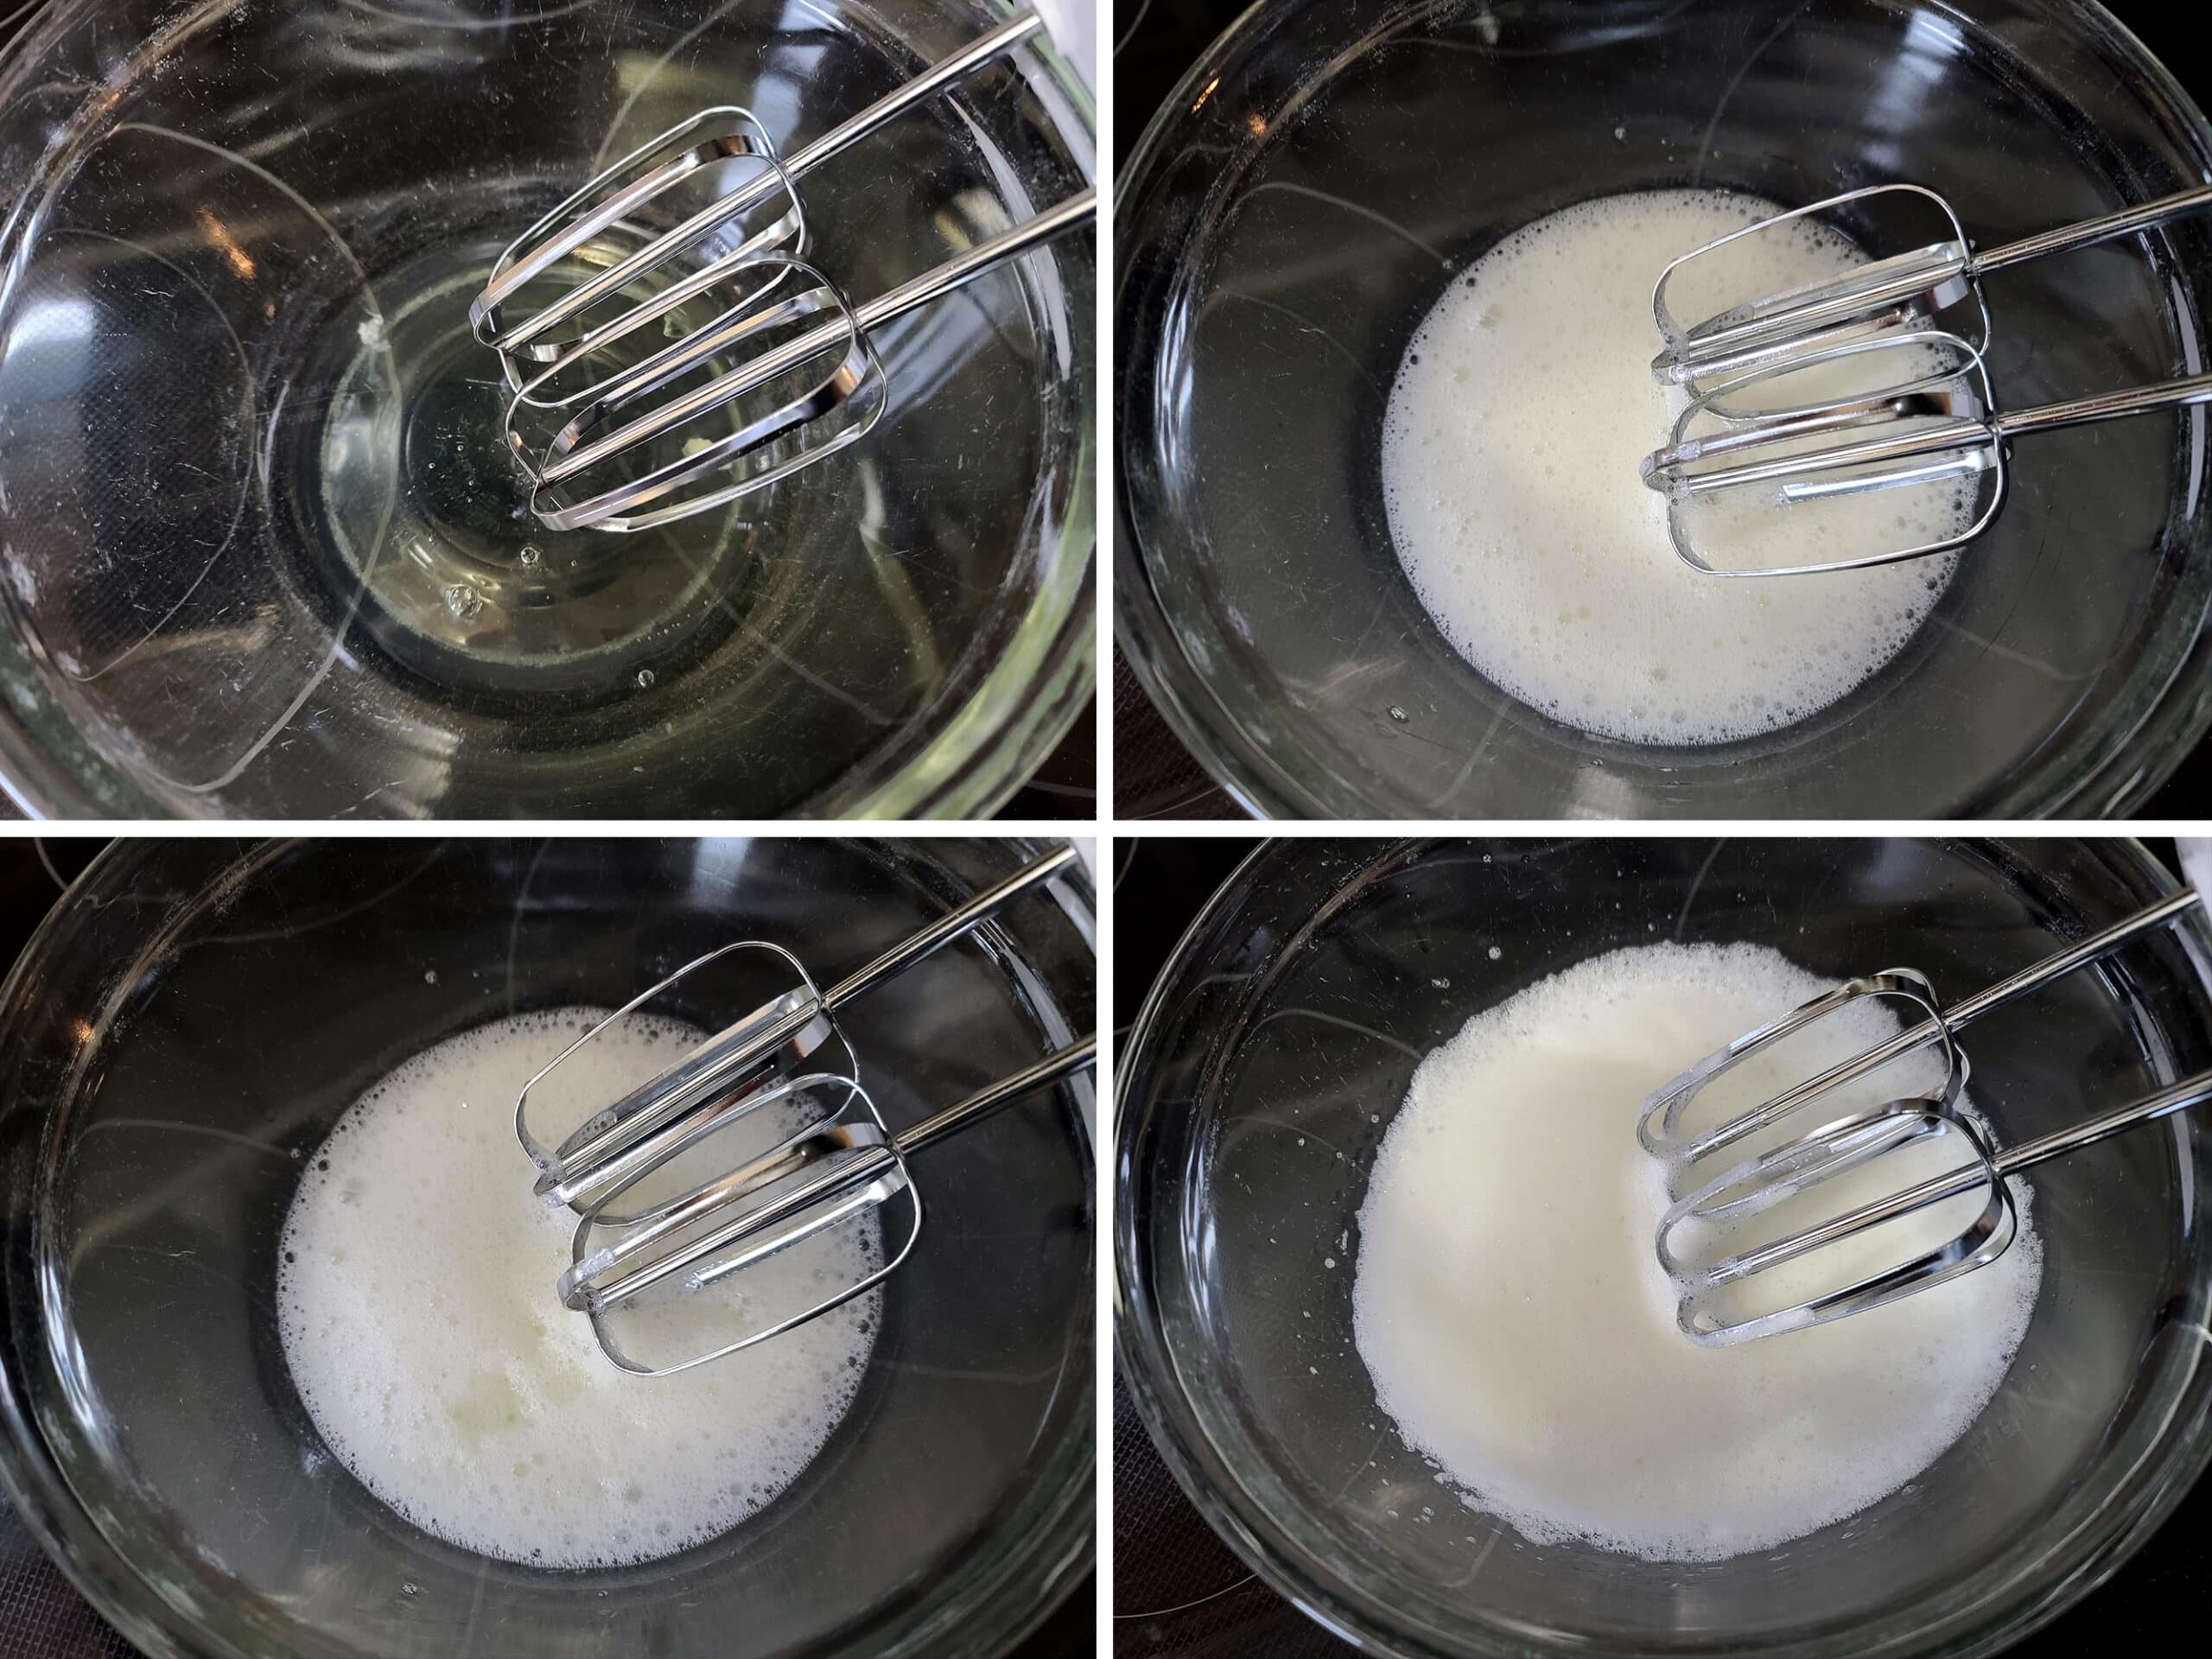
Add lemon juice, whip on low speed for few seconds to combine.
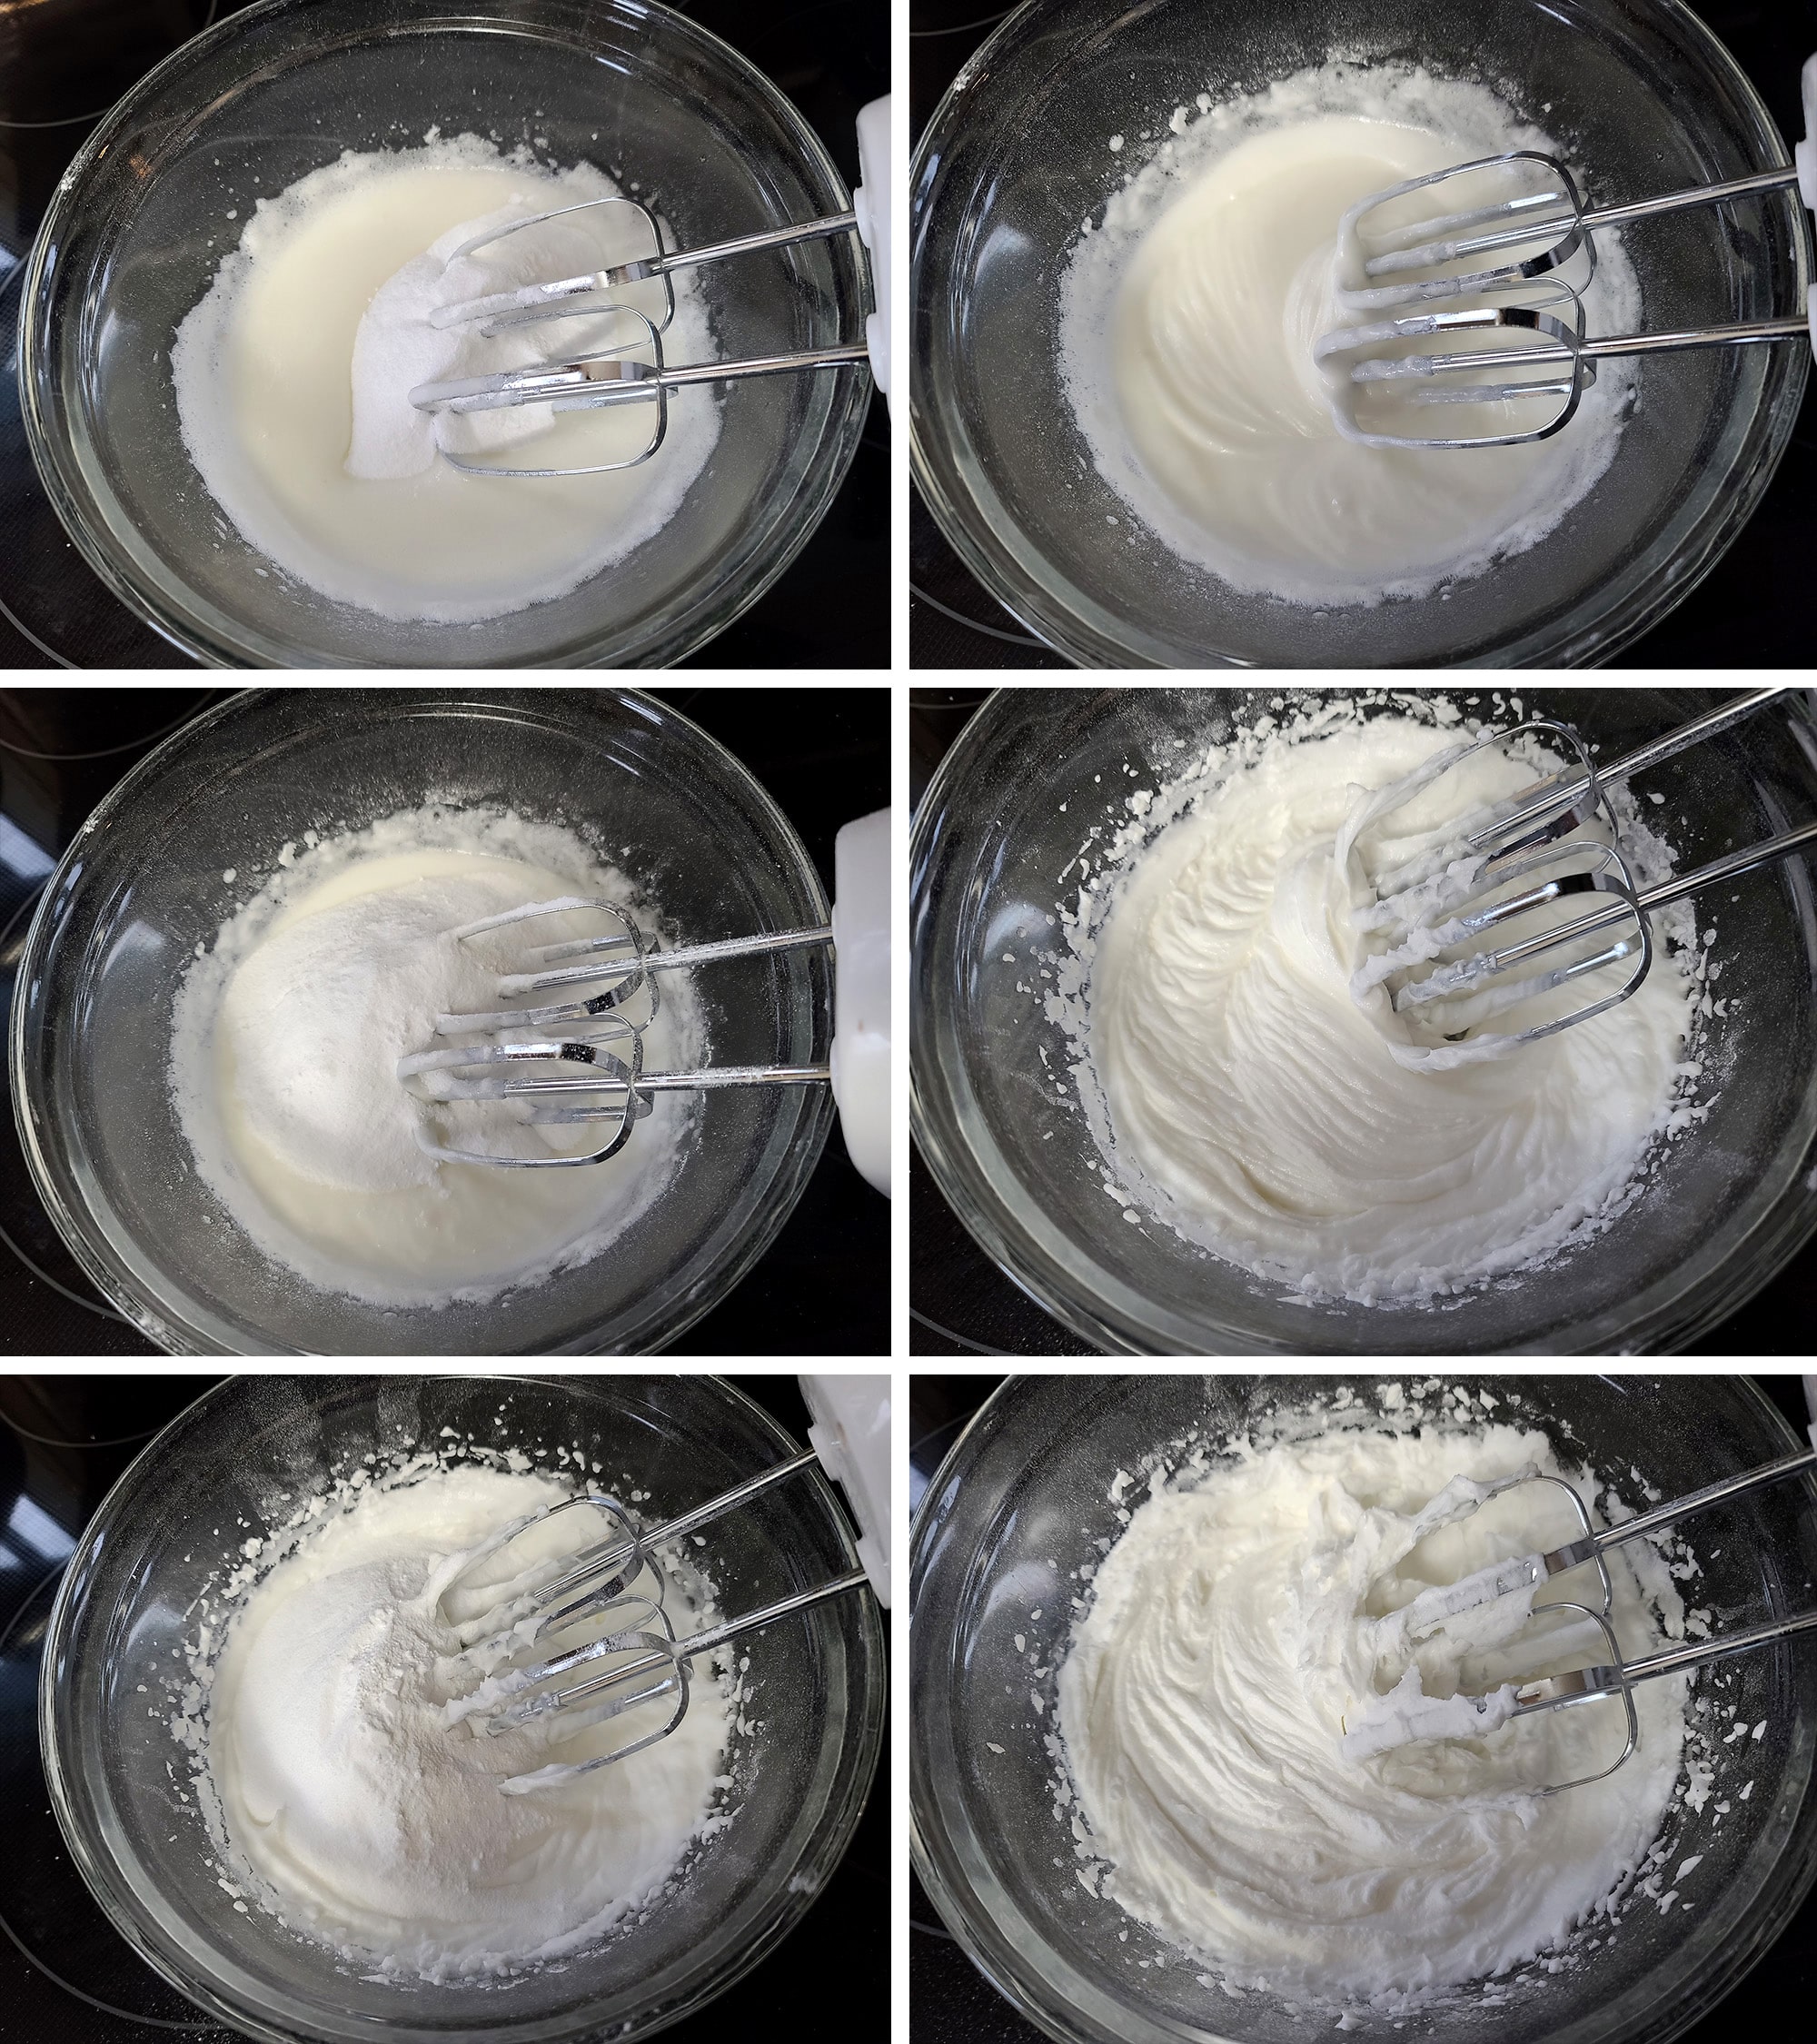
Once all of the allulose is added, whip on high speed the cookie icing reaches desired consistency.
You will want a fairly thick frosting – but still smooth and workable – for piping details and borders.
Aim for very stiff peaks to form - you can always thin a stiff consistency icing later.
Storing Leftover Royal Icing
If you're not using it immediately, transfer out of the large bowl, and into a smaller airtight container.
While you want room to work with it while you’re making the icing, you want a container that does NOT have a lot of extra room in it!
Cover the surface of the icing with plastic wrap.
You want the plastic wrap to be directly on top of the icing, to prevent any air from drying out the surface. (Note: This is important even when you’re using the icing!)
Cover with a tight fitting lid, store royal icing in the fridge for up to a week.

This sugar free royal icing may or may not separate as it’s stored. As with traditional royal icing, separation is common, expected, and not at all a problem.
I recommend that you re-beat the frosting before use, whether or not you see any separation.
Related: I don’t recommend storing the leftover icing in piping bags, but sometimes we forget or just get lazy. I know I sure do!
If you DO store your icing in piping bags, you’re still going to want to keep it in the fridge.
Also, plan to squeeze the frosting out into a small bowl and re-beat it, before transferring them into a new, clean piping bag before using it.
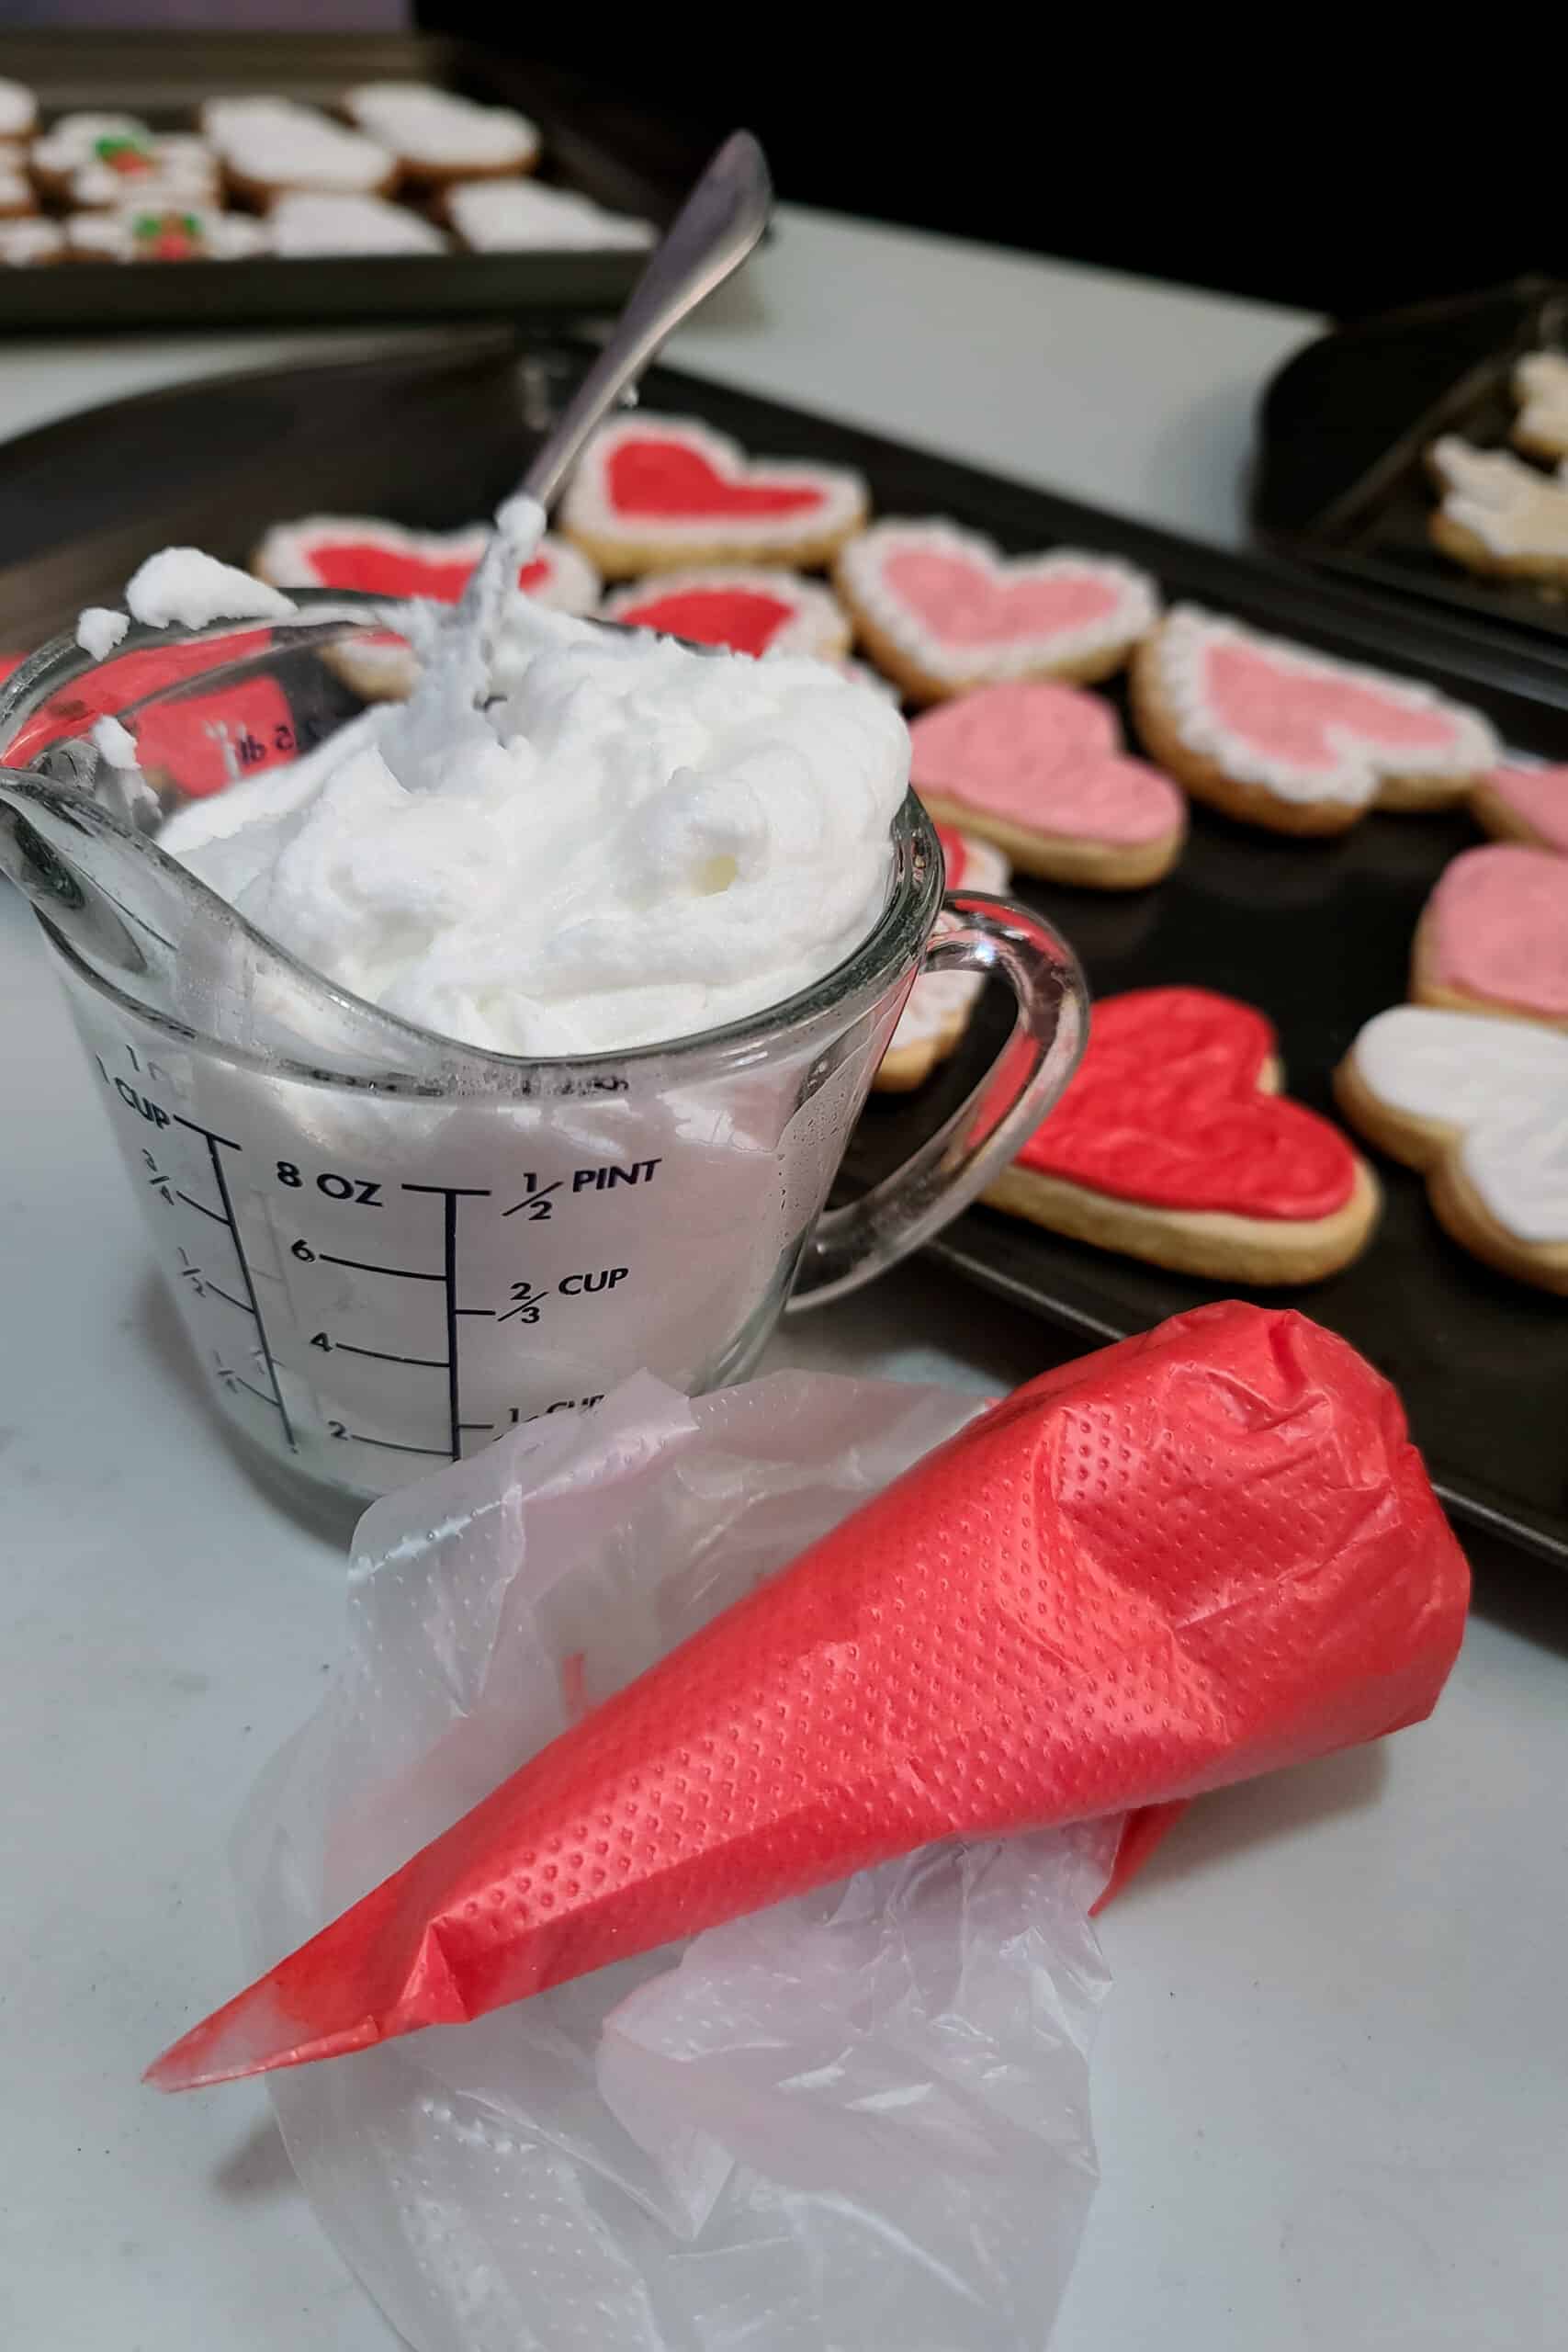
How to Use Sugar-Free Royal Icing
This sugar-free royal icing is easy to use, but it definitely behaves a little different than normal royal icing.
If you’re an experienced cookie decorator, don’t expect it to behave *exactly* how you’re used to - the texture is a bit different - but you’ll get used to it pretty quickly.
For those who haven’t used royal icing before - you’ll have no problem, don’t worry!
This is just one of those cases where familiarity can build confusion when there’s a change in play!
Anyway.
I’m going to go over some of the basics of decorating with royal icing here, I recommend seeing my post Sugar Cookie Decorating for Beginners for even more information - specifically when it comes to cookie decorating.
Consistency
Sugar free royal icing can be used in different ways, so you’ll want to play around with your batch to get the right consistency for what you’re doing.
I recommend starting out with a stiffer royal icing at the start - it’s easier to thin out a thicker icing with a little water, than it is to thicken a thinner icing.
This recipe make a royal icing that’s the proper consistency for setting up gingerbread houses and piping stiff details - you can pipe flowers, etc with it.

Always add less water than you think you’ll need.
Also: you can strain your lemon juice and use it in place of water, for a better flavoured, more stable icing.
For reference, I didn’t even bother thinning out the recipe when making the cookies pictured - I just piped it in little circles, rather than actually flooding.
It was too humid in my house to want to mess with longer dry times, etc!
I’m a big fan of “it tastes the same, even if it’s not as pretty!”. 🙂
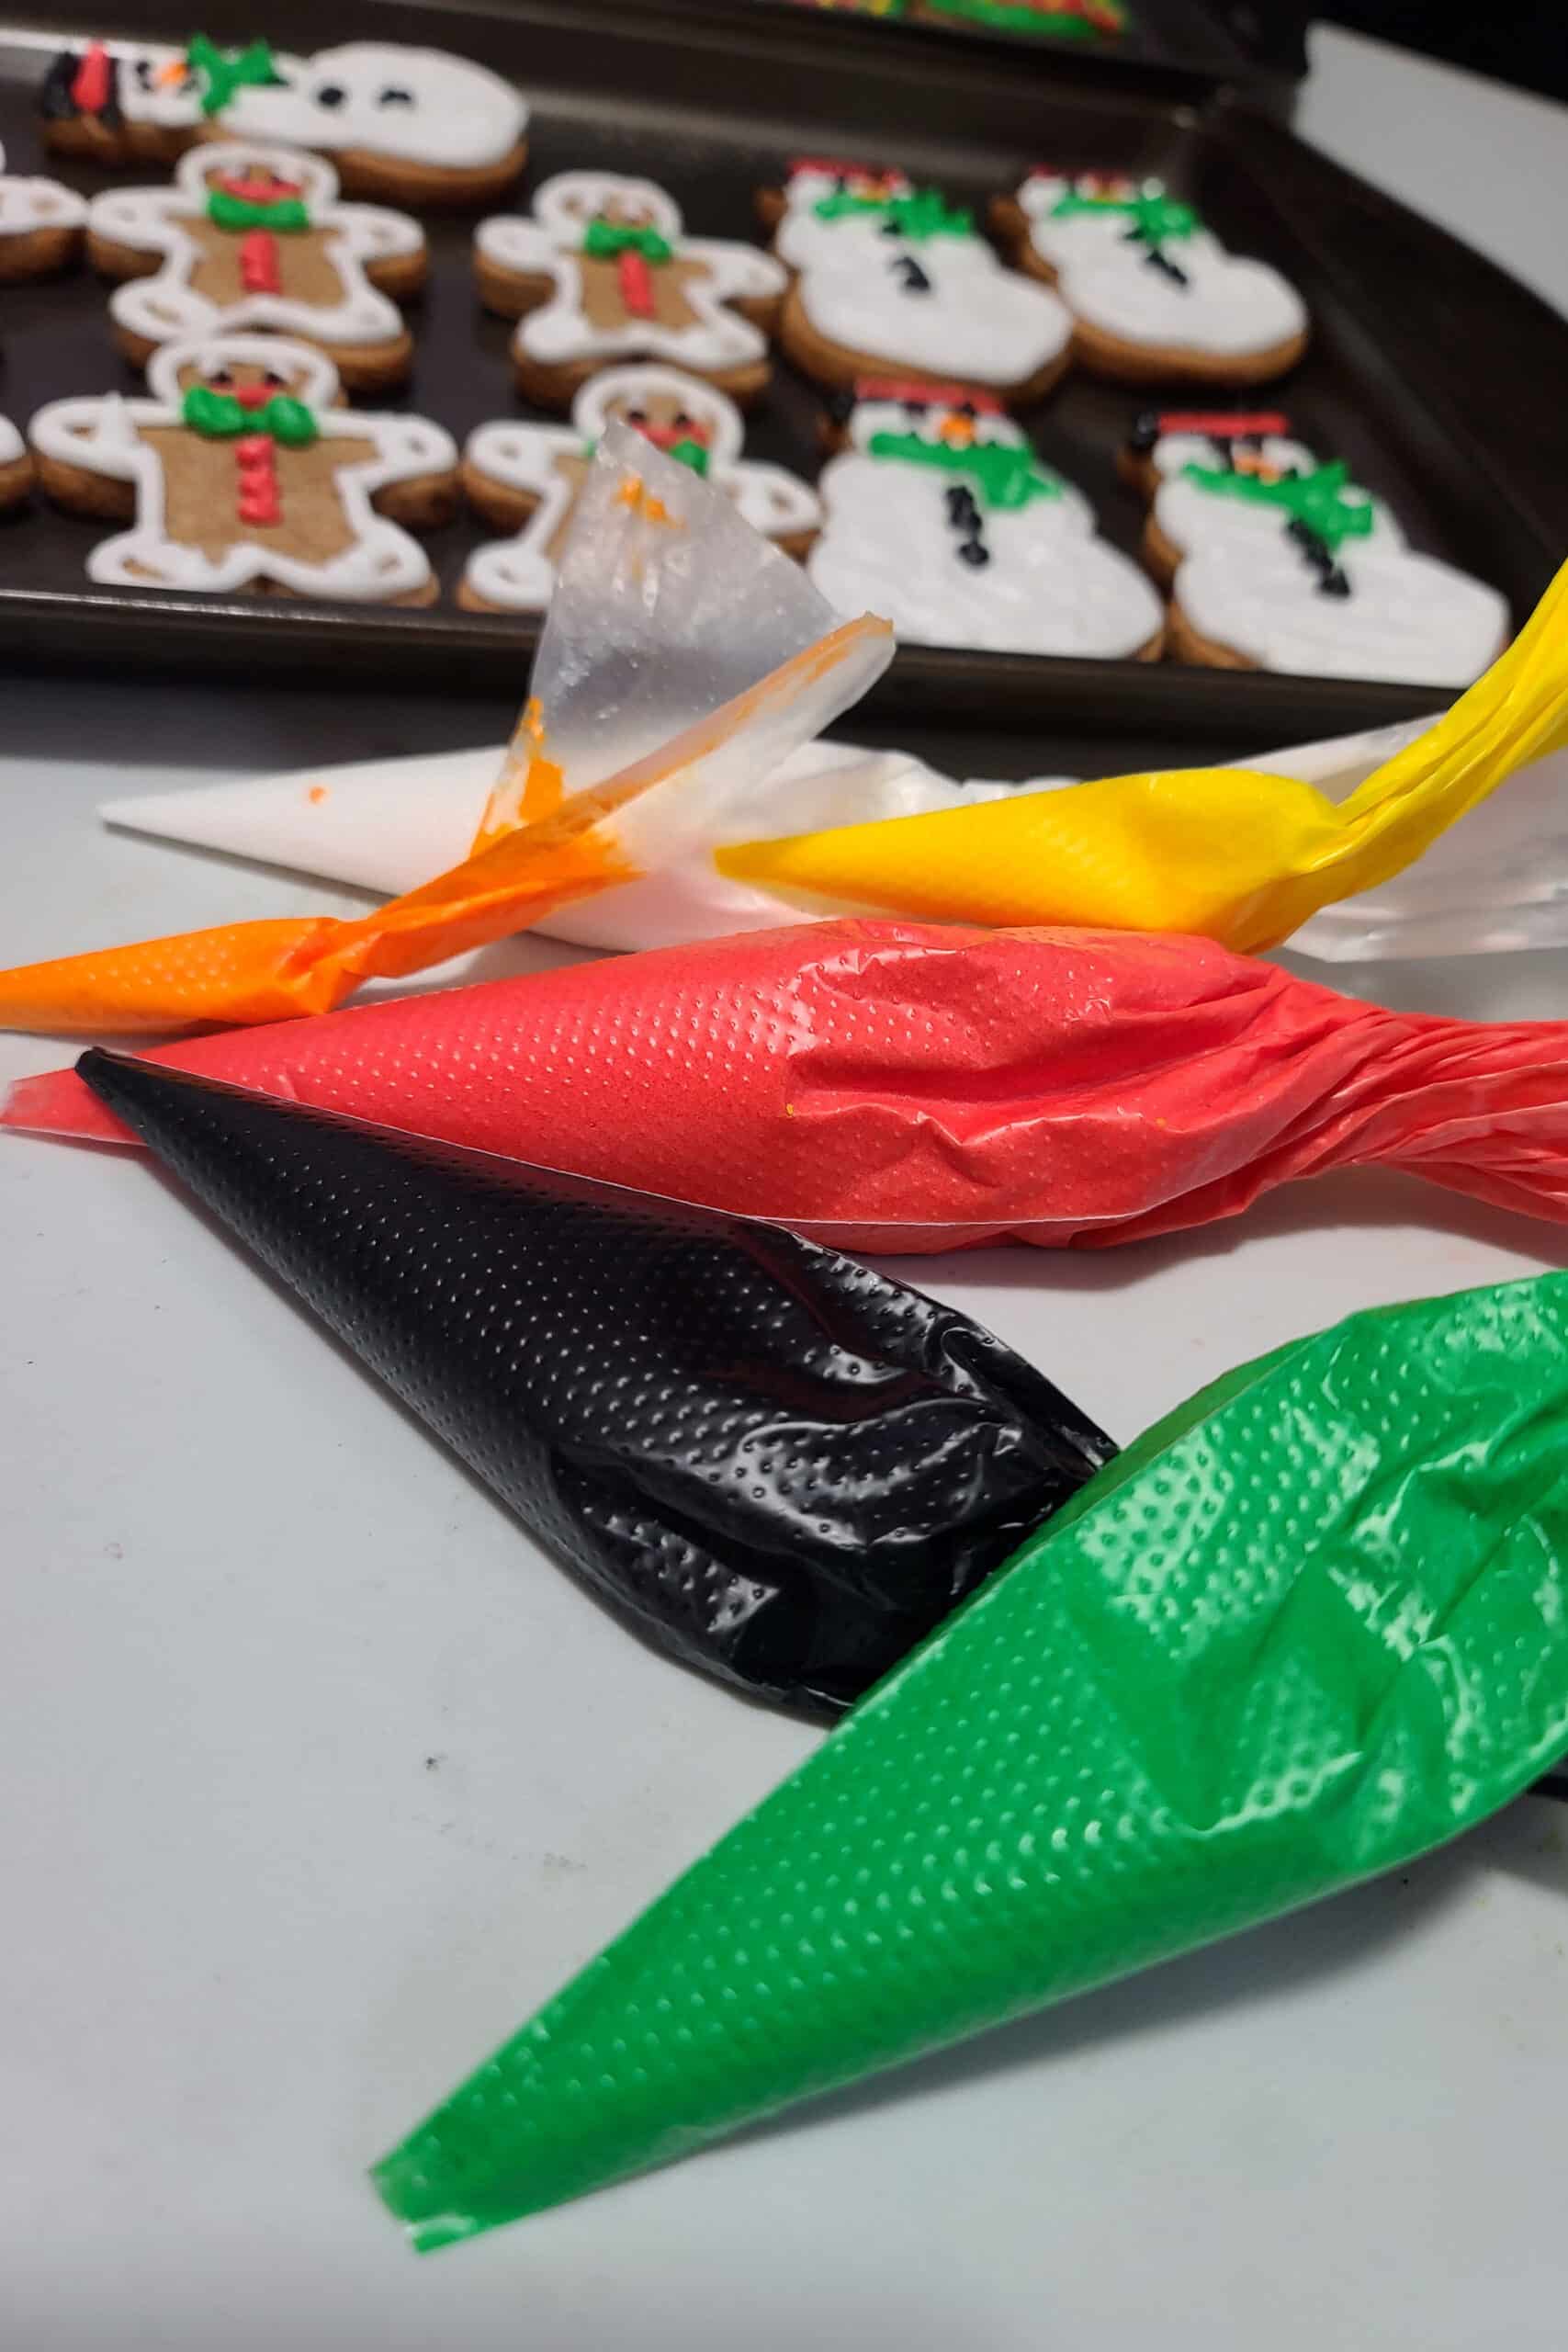
Icing Color
The type of food coloring you use really matters when it comes to royal icing - even more so than it does for a lot of other uses.
I will always recommend gel food coloring over liquid food coloring - it allows for a much deeper color, with less coloring used than you’ll need with liquid colors.
The fact that gel colors pack a punch is important here, as any amount of moisture can wildly change the texture - and usage - of your icing.
I recommend using a good quality gel colour, such as Americolor (This is what I used when I was in the USA), or ChefMaster (This is the option more readily available here!).
As a note: specifically when it comes to using red or black gel food coloring, don’t worry if the color doesn’t start out as intense as you’re looking for.
Those colours tend to develop over a little time - even after decorating.
I’ve piped cookies in a disappointing pinks and greys, only to have them end up the PERFECT fire engine red and deep dark black the next morning!

Using Food Coloring
For best results, color your sugar free royal icing, then thin it with a small amount of water or lemon juice as the next step.
I like to have a bunch of small bowls on hand - at least one for each color, plus a few extras for when I want to thin out some icing with a little bit of water.
Finally: be sure to cover each bowl of tinted royal icing as you finish mixing it, with plastic wrap RIGHT on top of the icing.
Royal icing can start drying out quickly, and as the edges start to crust - it’ll make it weird to pipe with.
Best to just avoid trying to push little chunks of dried frosting through a small piping tip, IMHO.
Drying
Drying is am important part of sugar cookie decorating.
Once you've decorated your cookies, let them air dry at room temperature. A low humidity environment is best, and you can help the process by running a fan across the cookies.
If you're using white as a base colour, you might want to let it dry full before piping other colours onto it, or the dye from those other colours *may* bleed into the white areas.
Make sure your cookies are fully dry before packaging them, and package them in airtight containers as soon as possible after they fully dry.

Equipment & Supplies
While you can just spread royal icing on cookies with the back of a spoon, you’ll have way more fun with decorating if you have a few other supplies:
Piping Bag
At the absolute bare minimum, you’ll want a piping bag. I generally use a Large Piping Bag for everything - you can trim them, if necessary!
Having a large pastry bag is handy, because having to refill the bag as you go = more opportunity for too much air to get introduced.
Extra air = air bubbles = your piping bag can “burp” as you decorate. This end up breaking piped lines, sputtering frosting, etc.
Best to just avoid air when possible!
Anyway, you can make a homemade piping bag if you need to - just spoon some royal icing into a plastic bag, and clip the very tip off one of the bottom corners.
Note: Some people like to use Cookie Decorating Squeeze Bottles instead of bags.
I don’t find the texture of this sugar free royal icing would work with that - at the very least, it would be really difficult to get it into the bottle in the first place!

Piping Tips
Piping tips are a nice thing to have if you’re looking to pipe really intricate designs - but they’re not necessary.
You can get away with just cutting the tip off your pastry bag, and going from there - and that’s exactly what I did in the cookies pictured throughout this post.
If you’d like to get really clean piping - round threads of icing - you’ll probably want to get a few piping tips.
I generally use Round Piping Tips - and Standard Decorating Couplers - for decorating cookies.
You can get all kinds of tips - basketweave, flower petals, leaves, etc - I just find that I don’t really use them on cookies.
Wilton #1 and Wilton #2 are good options for super fine details.
I’ll usually use a Wilton #3 or Wilton #4 for outlining cookies, and for piping thicker details on cookies.
Wilton #5 is good if you want a thicker border - I’ll usually do that when I’m piping one colour as the border, and a different for the fill.
If you’re using tips, you’ll want a Decorating Tip Brush - it makes life a lot easier when it comes to cleaning them!
Also, note: piping tips rust easily, so wash them as soon as you’re done with them, and let them air dry. Don’t put them in your sink to wash later!
Miscellaneous
While I didn’t use them on the cookies pictured, there are a few more optional things that you should know about:
1. A Cookie Scribe Tool can be used to mark out your design on a cookie, before piping your icing.
2. Food Color Markers can be used to draw on royal icing after it’s FULLY dried.
3. Luster Dust can be mixed with a drop of vodka and painted on to your cookies to give a pearlized or metallic finish.
4. Flat Cellophane Cookie Bags are a good idea to have, if you’ll be giving your cookies as gifts. Just make sure they’re FULLY dry before packing them!

More Keto Cookie Recipes
Looking to indulge your sweet tooth in a way that won’t spike your blood sugar? Here are some delicious recipes for low carb cookies to try!
Apple Pie Cookies
Biscotti
Candy Cane Cookies
Chewy Chocolate Peanut Butter Cookies
Chocolate Chip Cookies
Chocolate Protein Cookies
Cowboy Cookies
Gingerbread Cookies
Ladyfingers
Lemon Cookies
Peanut Butter Chocolate Chip Cookies
Peanut Butter Pecan Chocolate Chip Cookies
Pecan Pie Cookies
Pumpkin Spice Cookies
Raspberry Chocolate Thumbprint Cookies
Red Velvet Cookies
Rolled Sugar Cookies
Snickerdoodles
Soft Peanut Butter Cookies
Triple Chocolate Cookies
Witch Finger Cookies
... but wait, there's more! We have a whole keto desserts section: Keto Dessert Recipes! Check it out!
Share the Love!
Before you chow down, be sure to take some pics of your handiwork! If you post it to Bluesky, be sure to tag us - @CelebrationGen. We're also on Pinterest, so you can save all your favourite recipes to a board!
Also, be sure to subscribe to my free email newsletter, so you never miss out on any of my nonsense. Well, the published nonsense, anyway!
... and hey, if you love the recipe, please consider leaving a star rating and comment! (Sharing the post on social media is always appreciated, too!)

Sugar Free Royal Icing [Keto Cookie Decorating Icing]
Equipment
- Stand mixer or electric mixer
Ingredients
- 2 ½ cups Granulated Allulose
- 2 Large Egg White
- 2 teaspoon Lemon Juice
Instructions
- Measure allulose into a mini food processor, let it run until the allulose is powdered. Leave the lid on - letting the dust settle - while you start with the egg whites:
- In clean stand mixer - or with an electric hand mixer - whip egg whites until foamy.
- Add lemon juice, whip for few seconds to combine.
- Slowly add powdered allulose until cookie icing reaches desired consistency. You will want a fairly thick frosting – but still smooth and workable – for piping details and borders.
- If you're not using it immediately, transfer to an airtight container, cover surface with plastic wrap, and secure lid tightly.
- Re-whip before use.
Notes
Nutrition








Leave a Reply